Comprehensive Timber Floor Restoration Process Guide
- Axholme Floor Care
- Apr 5
- 4 min read
Updated: Apr 6
When it comes to bringing life back to tired, worn wooden floors, the right approach can make all the difference. Whether your floors have endured years of foot traffic, scratches, or water damage, restoring them can transform your space and add lasting value. I’m here to walk you through the entire timber floor restoration process, sharing practical tips and insights that will help you achieve stunning results. Let’s dive in and explore how you can breathe new life into your wooden floors with confidence.
Understanding the Timber Floor Restoration Process
Restoring timber floors is a rewarding project, but it requires a clear plan and the right tools. The process typically involves several key steps, each designed to address specific issues and prepare your floor for a beautiful finish.
Assessment and Preparation
Before you start, take a close look at your floors. Identify any deep scratches, stains, or areas where the wood might be damaged. This initial assessment helps you decide whether you need minor repairs or a full restoration. Clear the room of furniture and clean the floor thoroughly to remove dust and debris.
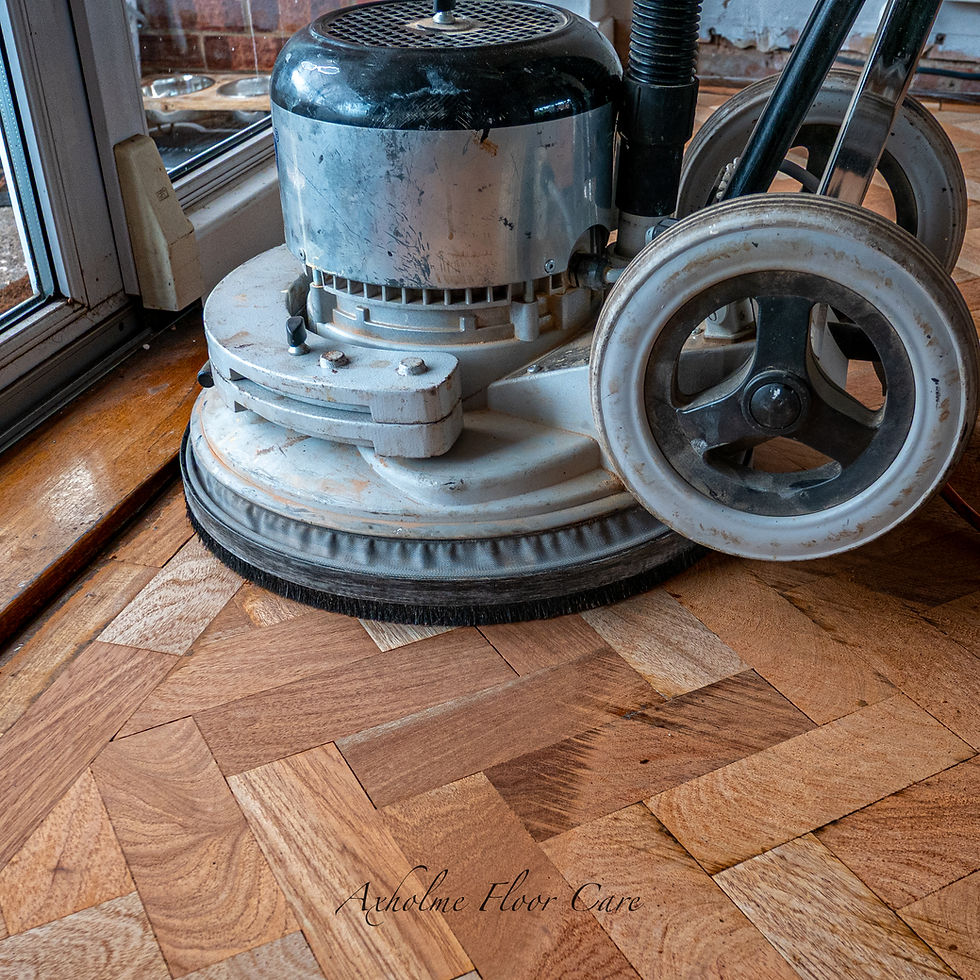
Sanding the Floor
Sanding is the heart of the restoration process. It removes the old finish, smooths out imperfections, and prepares the wood for a fresh coat. Start with a coarse grit sandpaper to tackle rough patches, then gradually move to finer grits for a smooth surface. Be sure to sand evenly to avoid dips or uneven spots.
Repairs and Filling Gaps
After sanding, inspect the floor again. Fill any cracks or gaps with wood filler that matches your floor’s colour. This step ensures a seamless look once the finish is applied. Allow the filler to dry completely before moving on.
Cleaning Up Dust
Sanding creates a lot of dust, so thorough cleaning is essential. Use a vacuum and a damp cloth to remove all dust particles. This step is crucial because dust can ruin the finish if left behind.
Applying the Finish
Choose a finish that suits your lifestyle and aesthetic preferences. Options include oil-based varnishes, water-based finishes, or natural oils. Apply the finish evenly with a brush or roller, following the grain of the wood. Multiple coats may be necessary, with light sanding between coats for the best results.
Curing and Maintenance
Allow the finish to cure fully before walking on the floor or moving furniture back in. Proper maintenance, such as regular cleaning and using protective pads under furniture, will keep your floors looking great for years.
How much does it cost to restore wooden floors?
One of the most common questions I get asked is about the cost of restoring wooden floors. The price can vary widely depending on several factors:
Size of the area: Larger floors require more materials and labour, increasing the cost.
Condition of the floor: Floors with extensive damage or deep stains may need more intensive work.
Type of wood: Some hardwoods are more expensive to restore due to their density or finish requirements.
Finish choice: Premium finishes or oils can add to the overall cost.
Labour: Hiring professionals will cost more than a DIY approach but often guarantees better results.
On average, you might expect to pay between £20 and £40 per square metre for professional restoration. DIY projects can be cheaper but require investment in equipment and materials. Remember, quality restoration is an investment that enhances your property’s value and appeal.
Essential Tools and Materials for Timber Floor Restoration
Having the right tools and materials on hand makes the restoration process smoother and more effective. Here’s a list of essentials you’ll need:
Floor sander (drum or orbital)
Edge sander for corners and edges
Sandpaper in various grits (coarse to fine)
Wood filler for cracks and gaps
Vacuum cleaner and damp cloths for dust removal
Brushes or rollers for applying finish
Protective gear such as masks and goggles
Finish (varnish, oil, or polyurethane)
Putty knife for applying filler
Using quality materials ensures a durable and beautiful finish. If you’re unsure about any product, consult with a specialist or your local timber floor care provider.

Tips for Maintaining Restored Wooden Floors
Once your floors look their best, keeping them that way is easier than you might think. Here are some simple but effective maintenance tips:
Regular cleaning: Sweep or vacuum frequently to remove dirt and grit that can scratch the surface. Use a damp mop with a wood floor cleaner recommended by your finish manufacturer.
Protective pads: Attach felt pads to the bottom of furniture legs to prevent scratches.
Avoid water damage: Wipe up spills immediately and avoid using excessive water when cleaning.
Area rugs: Place rugs in high-traffic areas to reduce wear.
Refinish when needed: Over time, your floor may need a light sanding and reapplication of finish to maintain its shine and protection.
By following these tips, you’ll extend the life of your floors and keep them looking fresh and inviting.
Why Choose Professional Timber Floor Restoration?
While DIY restoration can be tempting, professional services offer several advantages that are worth considering:
Expertise: Professionals understand the nuances of different wood types and finishes.
Equipment: They have access to industrial-grade sanders and dust extraction systems.
Time-saving: Restoration can be completed more quickly and efficiently.
Quality results: A professional finish lasts longer and looks more polished.
Warranty and support: Many companies offer guarantees on their work, giving you peace of mind.
If you want to ensure your floors are restored to their full potential, hiring a trusted family-run business like Axholme Wood Floor Care can be a great choice. They specialise in delivering stunning, long-lasting results that exceed expectations.
If you want to learn more about the timber floor restoration process or get a quote, visiting their website is a good first step.
Bringing Your Floors Back to Life
Restoring wooden floors is a journey that combines patience, care, and the right techniques. Whether you decide to tackle the project yourself or call in the experts, understanding the process helps you make informed decisions. Remember, your floors are a foundation of your home or business’s character and charm. With the right approach, you can enjoy their natural beauty for many years to come.
If you’re ready to start your restoration project, take the time to plan carefully, gather your tools, and embrace the transformation. Your floors will thank you with warmth, elegance, and timeless appeal.


Comments